Part Five: Google Oauth
About#
How to add Google OAuth Logins to your Supabase Application.
Watch#
Logging in with external OAuth providers#
Connecting social logins such as Google, GitHub, or Facebook couldn't be easier. In this guide we'll walk you through the process of connecting Google, but the process is basically the same for all of the providers which includes: azure, bitbucket, github, gitlab, facebook, and google.
First you'll need to create a google project inside their cloud console, in other providers they may refer to this as an "app" and is usually available on the company's developer portal.
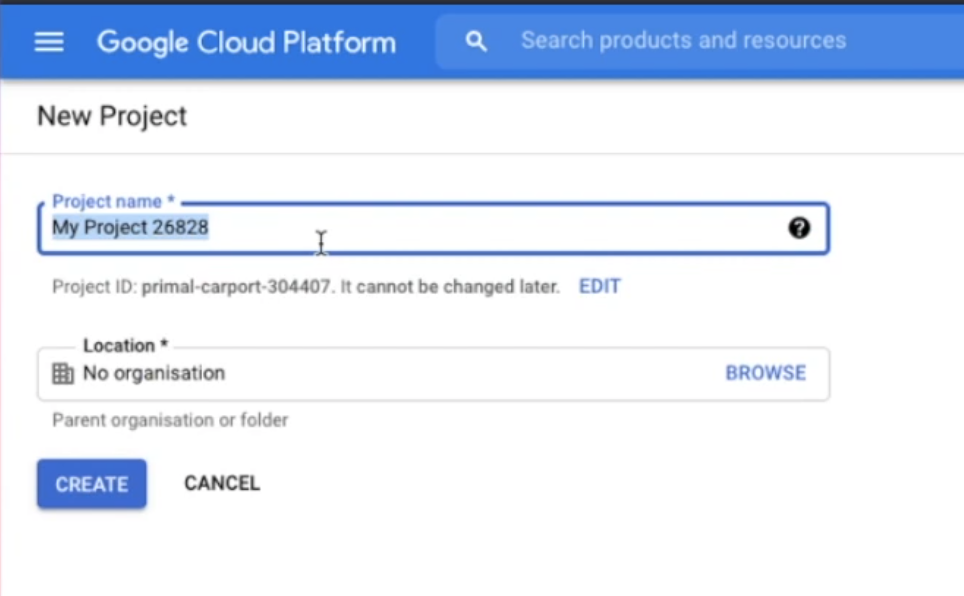
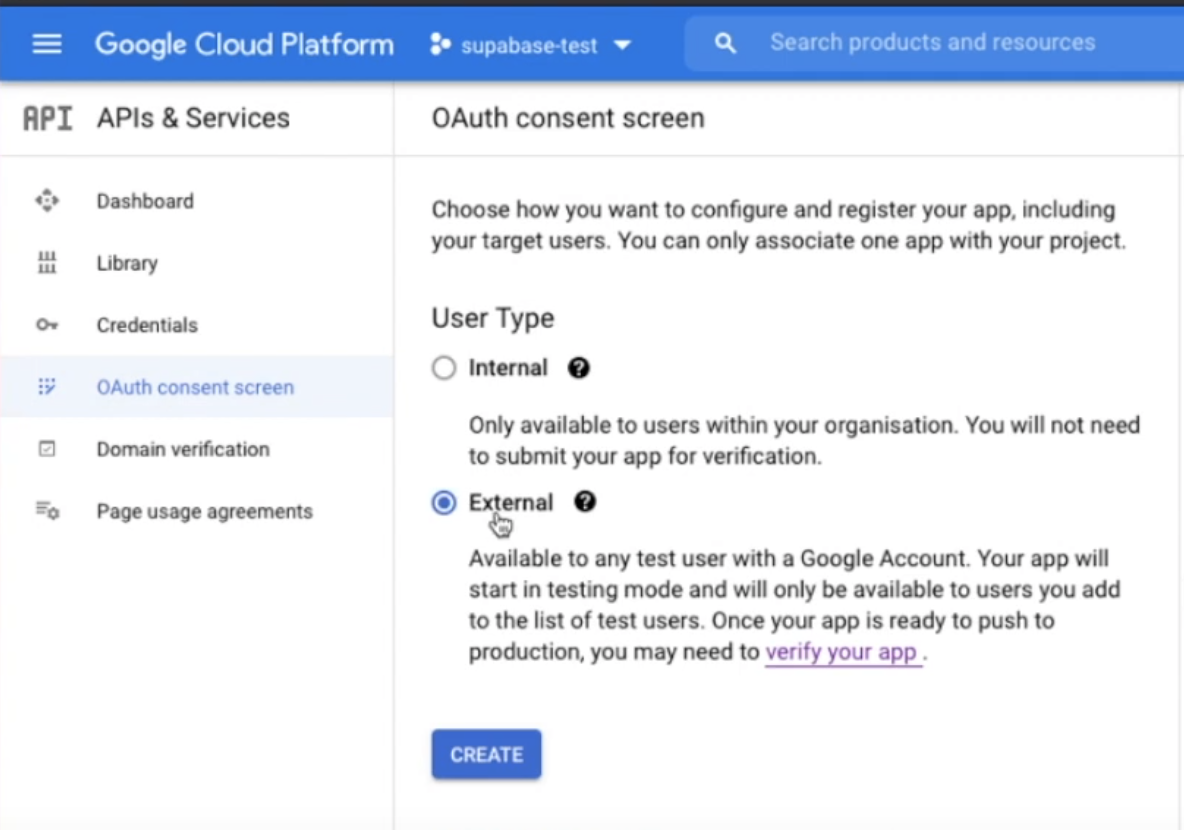
Once you have a project, type "OAuth" into the search bar and open up "OAuth Consent Screen"

Select 'External' and proceed to fill out the rest of the form fields
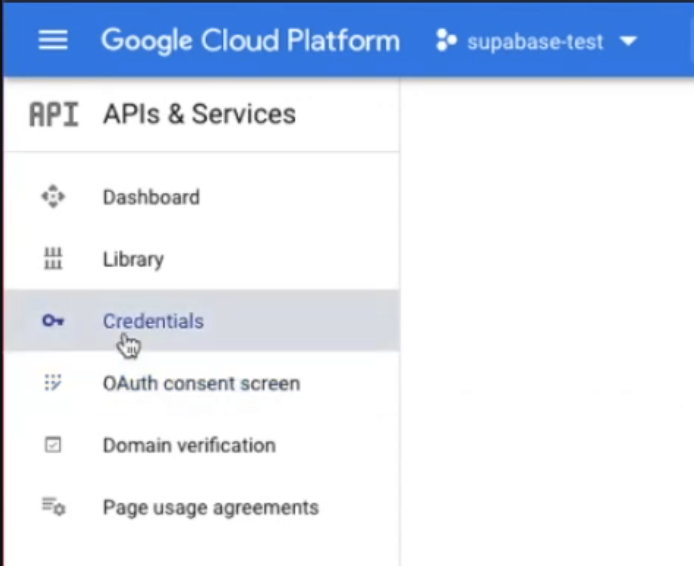
Next open up Credentials page on the left
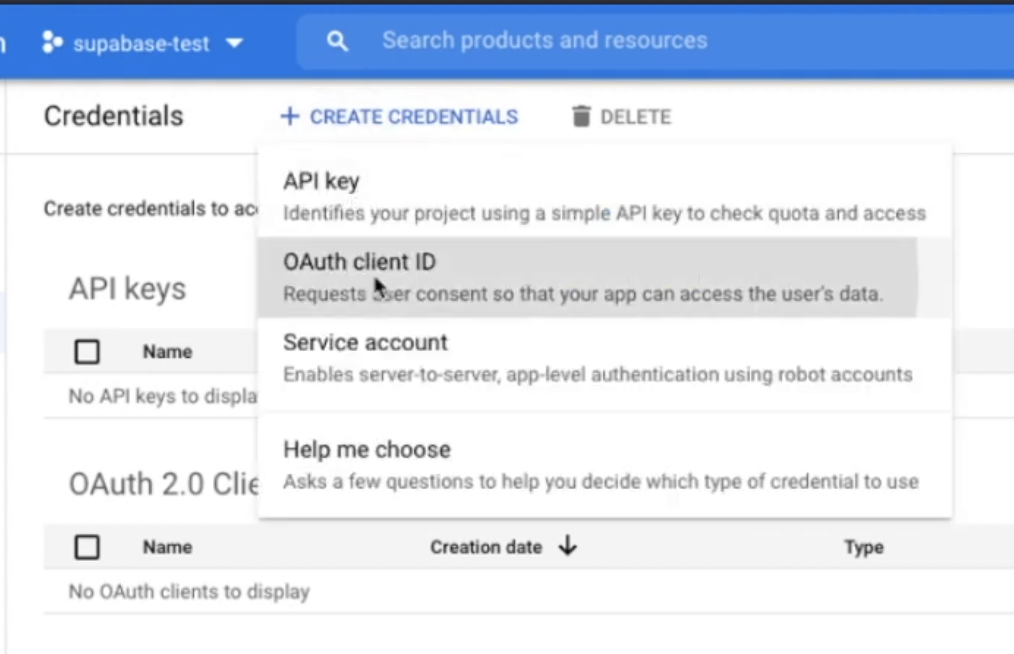
And click to create a new set of credentials, select OAuth client ID as the option
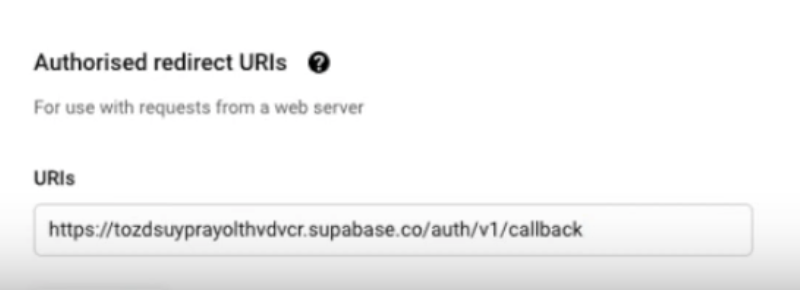
Now choose Web Application (assuming you're creating a web app) and in the Authorized redirect URI section you need to add: https://<your-ref>.supabase.co/auth/v1/callback. You can find your Supabase URL in Settings > API inside the Supabase dashboard.
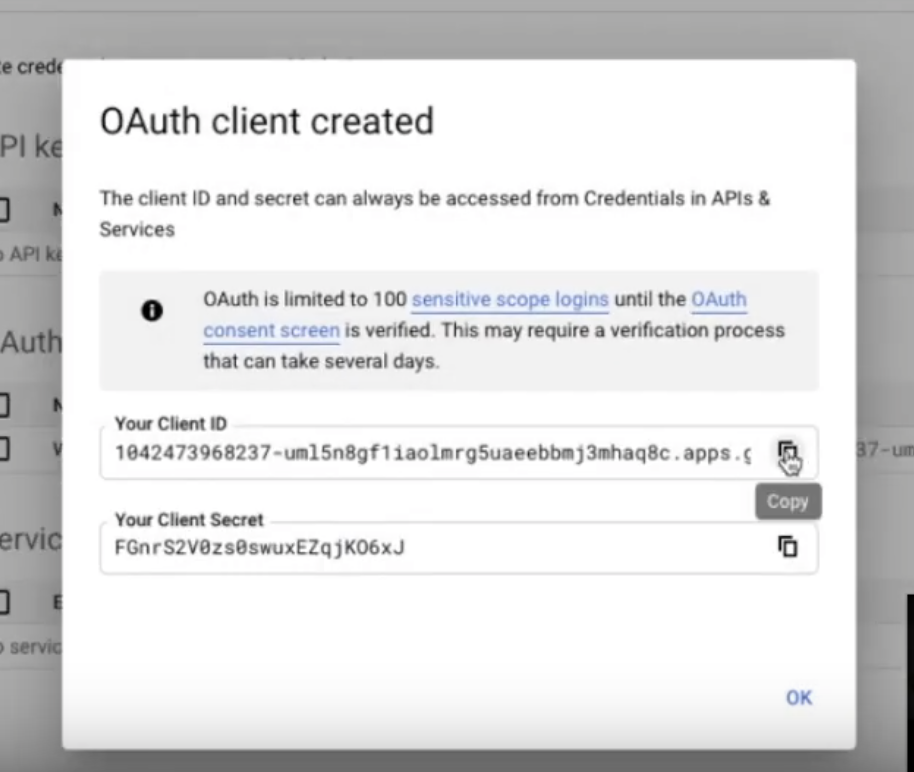
Now you can grab the client ID and secret from the popup, and insert them into the google section inside the Supabase dashboard in Auth > Settings:
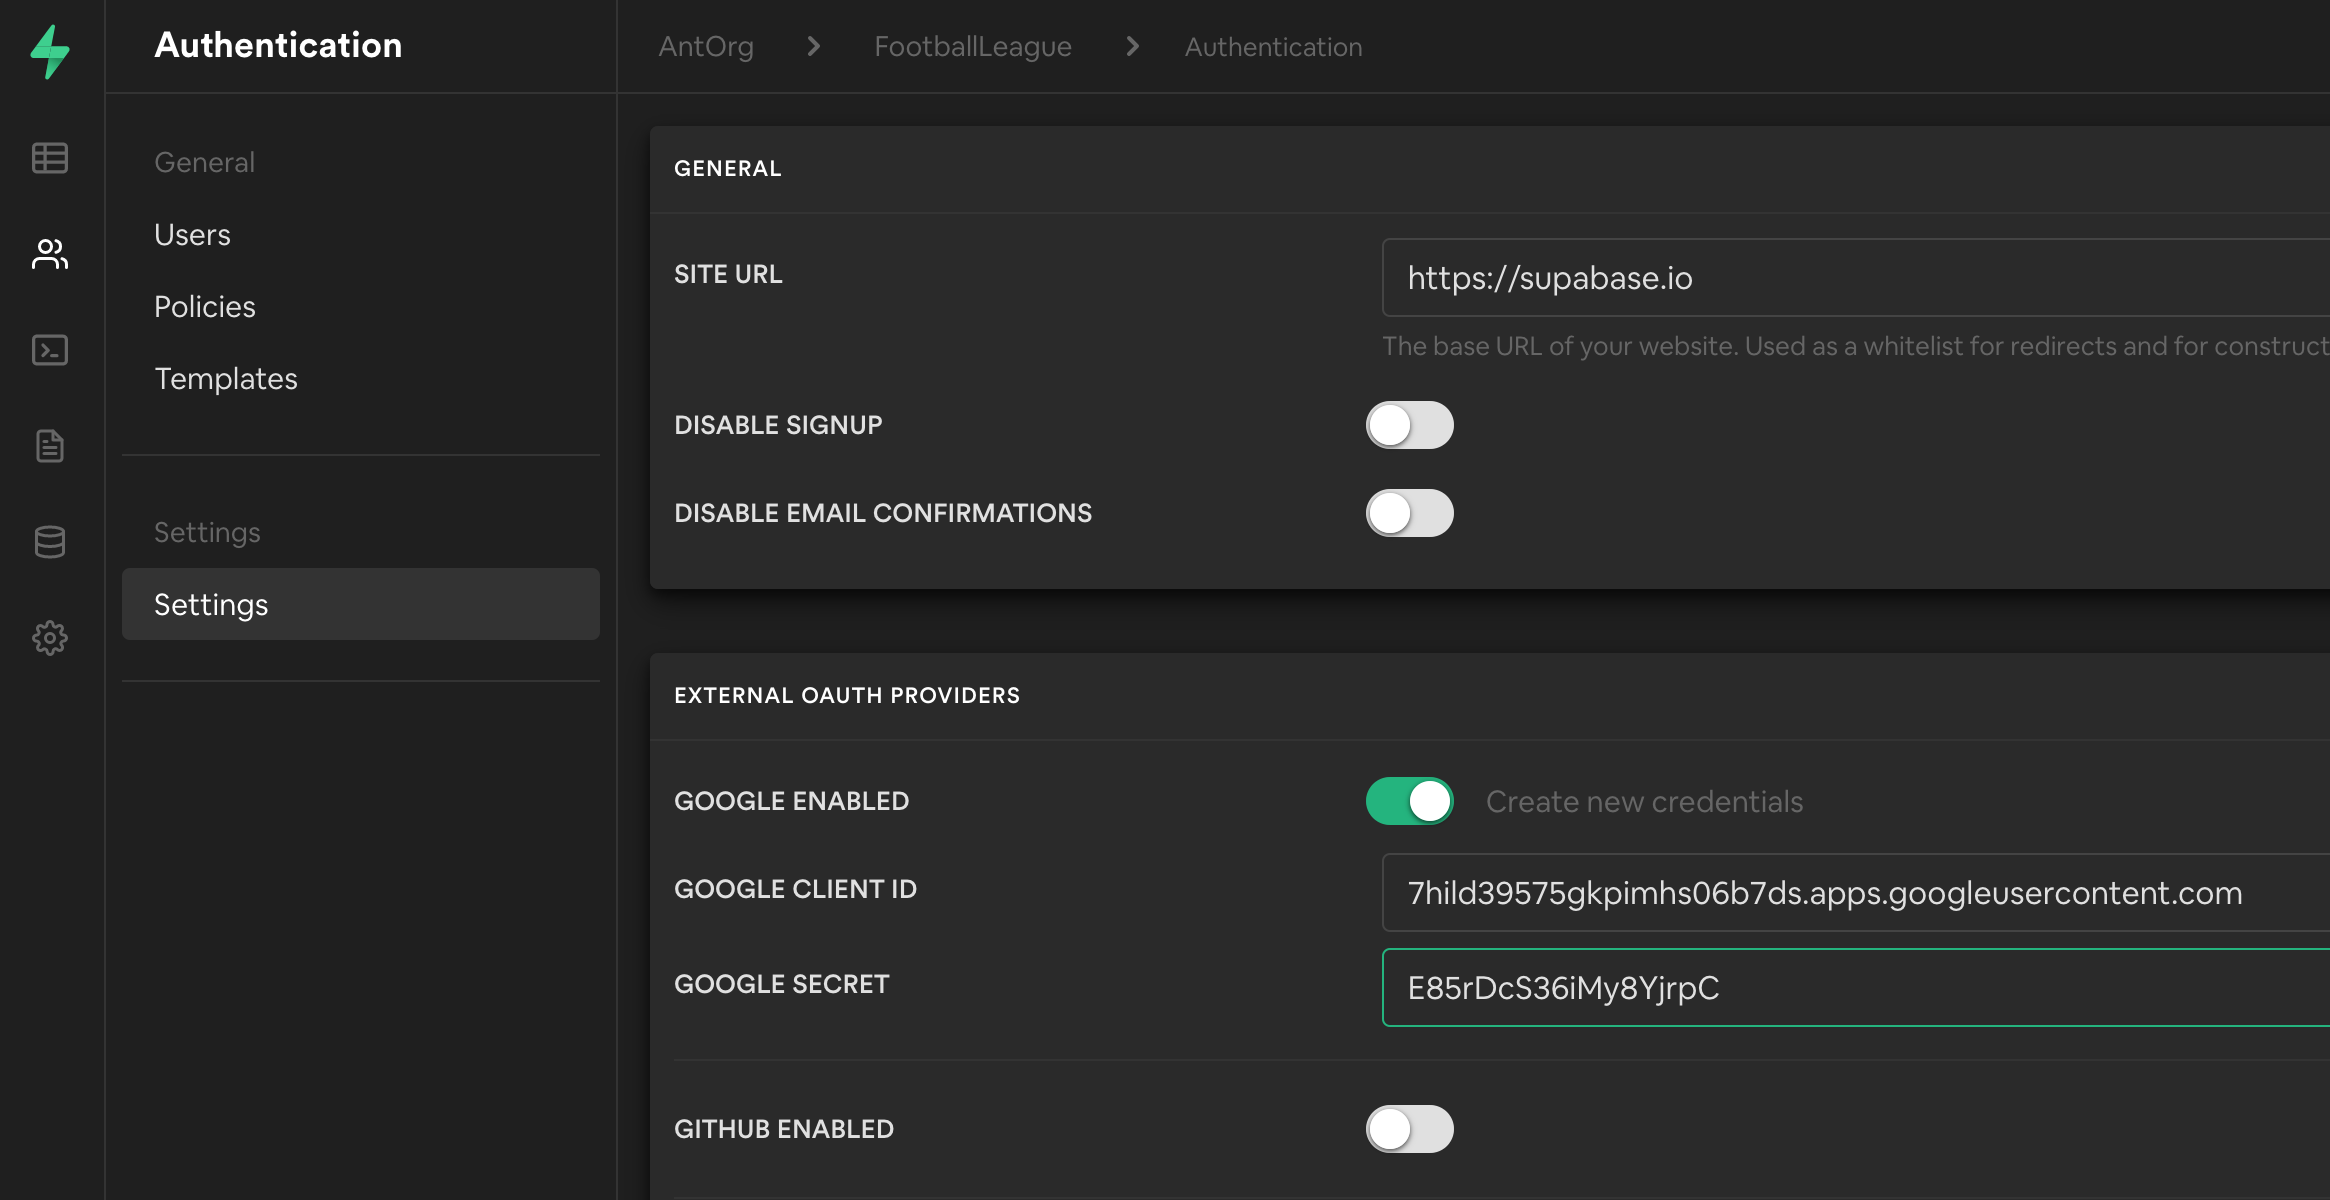
Hit save. Now you should be able to navigate in the browser to:
https://<your-ref>.supabase.co/auth/v1/authorize?provider=google
And log in to your service using any google or gmail account.
You can additionally add a query parameter redirect_to= to the end of the URL for example:
https://<your-ref>.supabase.co/auth/v1/authorize?provider=google&redirect_to=http://localhost:3000/welcome
But make sure any URL you enter here is on the same host as the site url that you have entered on the Auth > Settings page on the Supabase dashboard. (There is additional functionality coming soon, where you'll be able to add additional URLs to the allow list).
If you want to redirect the user to a specific page in your website or app after a successful authentication.
You also have the option of requesting additional scopes from the oauth provider. Let's say for example you want the ability to send emails on behalf of the user's gmail account. You can do this by adding the query parameter scopes, like:
https://<your-ref>.supabase.co/auth/v1/authorize?provider=google&https://www.googleapis.com/auth/gmail.send
Note however that your app will usually have to be verified by Google before you can request advanced scopes such as this.
The only thing left to implement is the UI, but if you prefer to use something pre-built, we have a handy Auth Widget, where you can enable/disable whichever auth providers you want to support.
For any support please get in touch at beta at supabase.com or for feature requests open an issue in the backend or frontend repos.
Resources#
Next steps#
- Watch Part One: JWTs
- Watch Part Two: Row Level Security
- Watch Part Three: Policies
- Watch Part Four: GoTrue
- Sign up for Supabase: app.supabase.com