Sequin
This guide explains how to quickly setup a sync between Sequin and a Supabase Postgres database.
Sequin allows you to sync platforms like Stripe and Salesforce with Supabase in real-time. You'll be able to read and write to your Stripe customers or Salesforce accounts right from the Supabase client using SQL. Here's how to get setup.
Step 1: Connect Sequin to Supabase#
To connect Supabase to Sequin, you'll first need to retrieve the credentials for your Supabase Postgres database:
In the Supabase dashboard, go to the settings page and open up your Database settings. In the Connection info section, you'll find the credentials you need - like
hostanduser: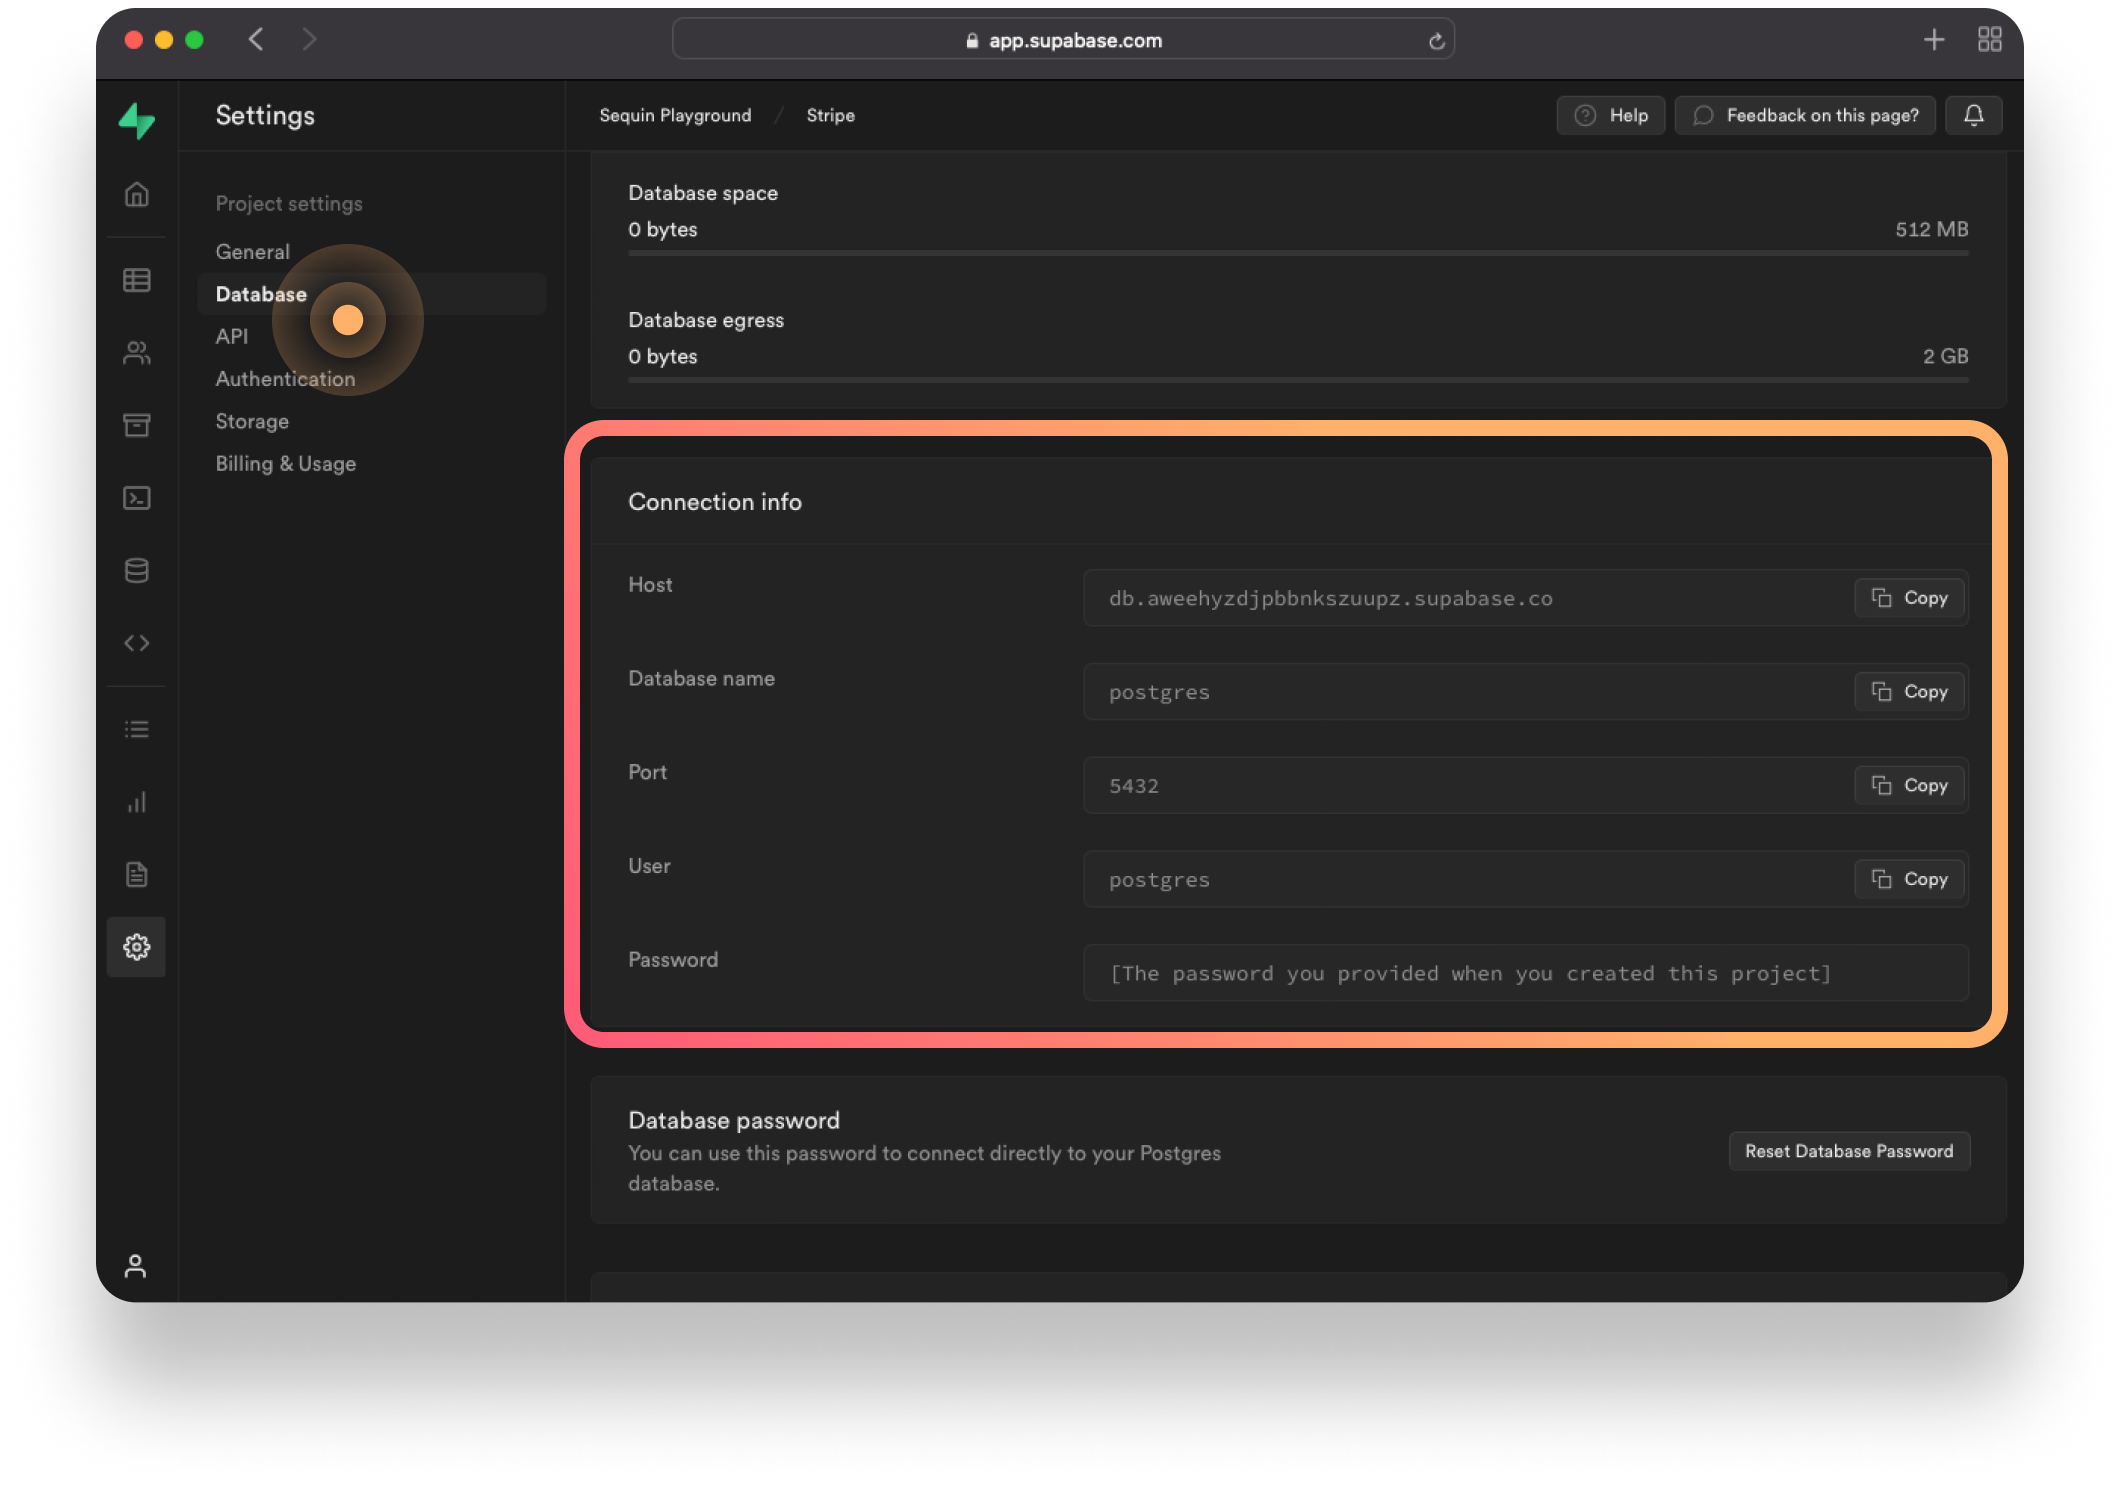
In the Sequin console, go to your sync's configuration and open the Destination section. Select Launch or Connect and then click Connect to configure the connection to your Supabase Postgres:
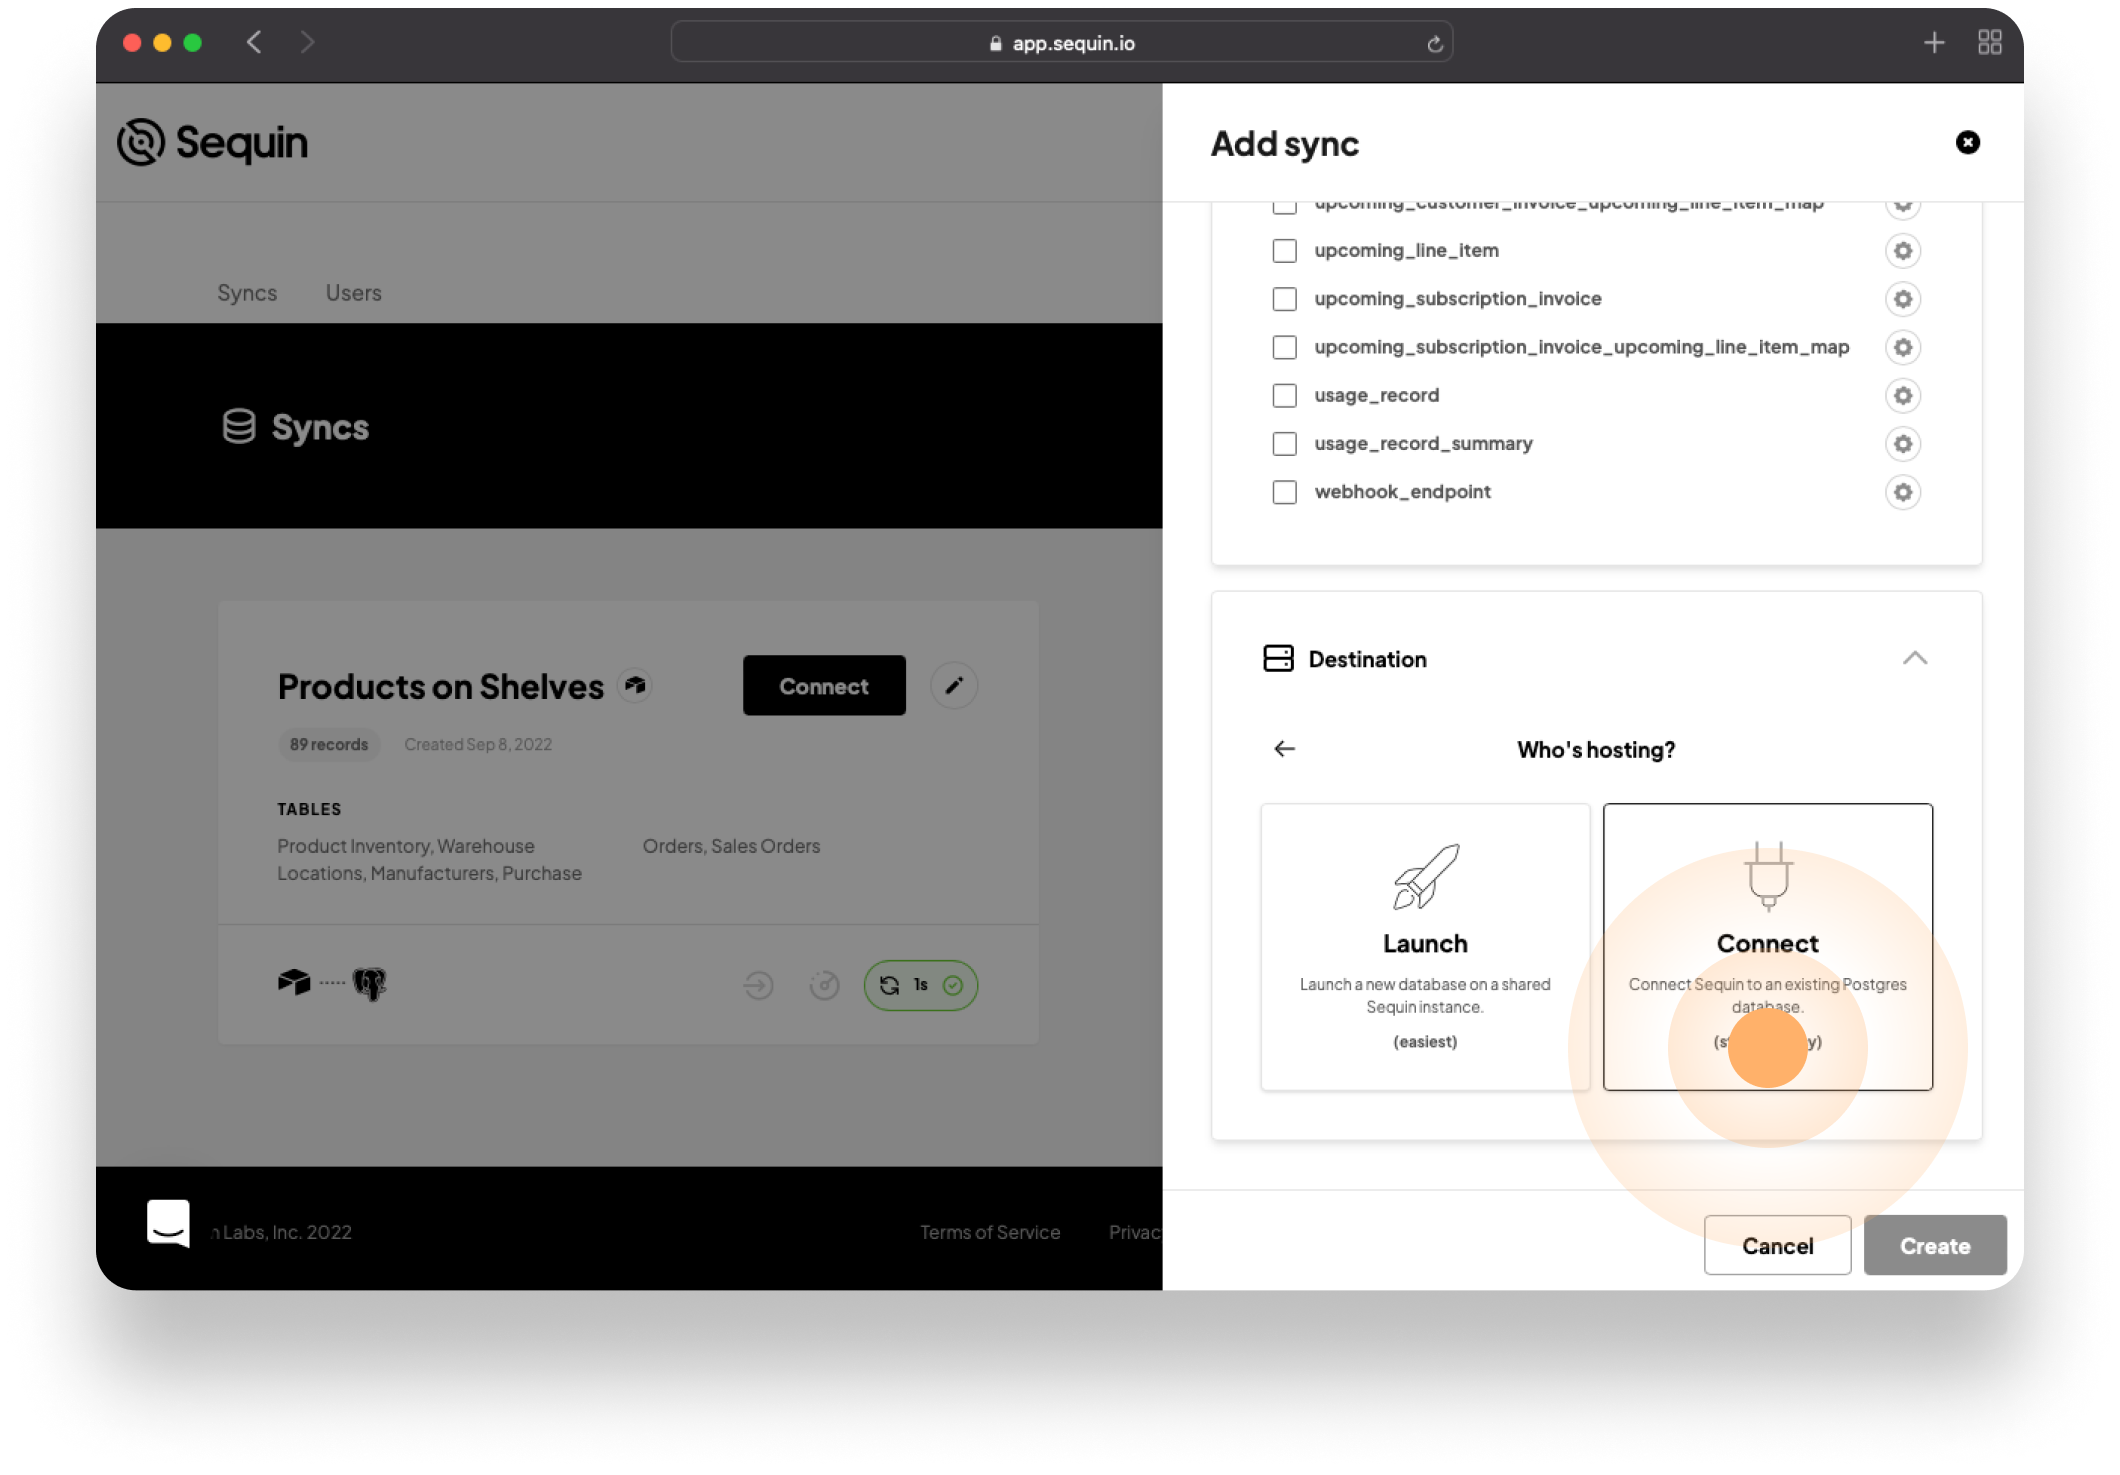
In the connection modal that appears, enter the
HostandPortfor your Supabase database and click Continue.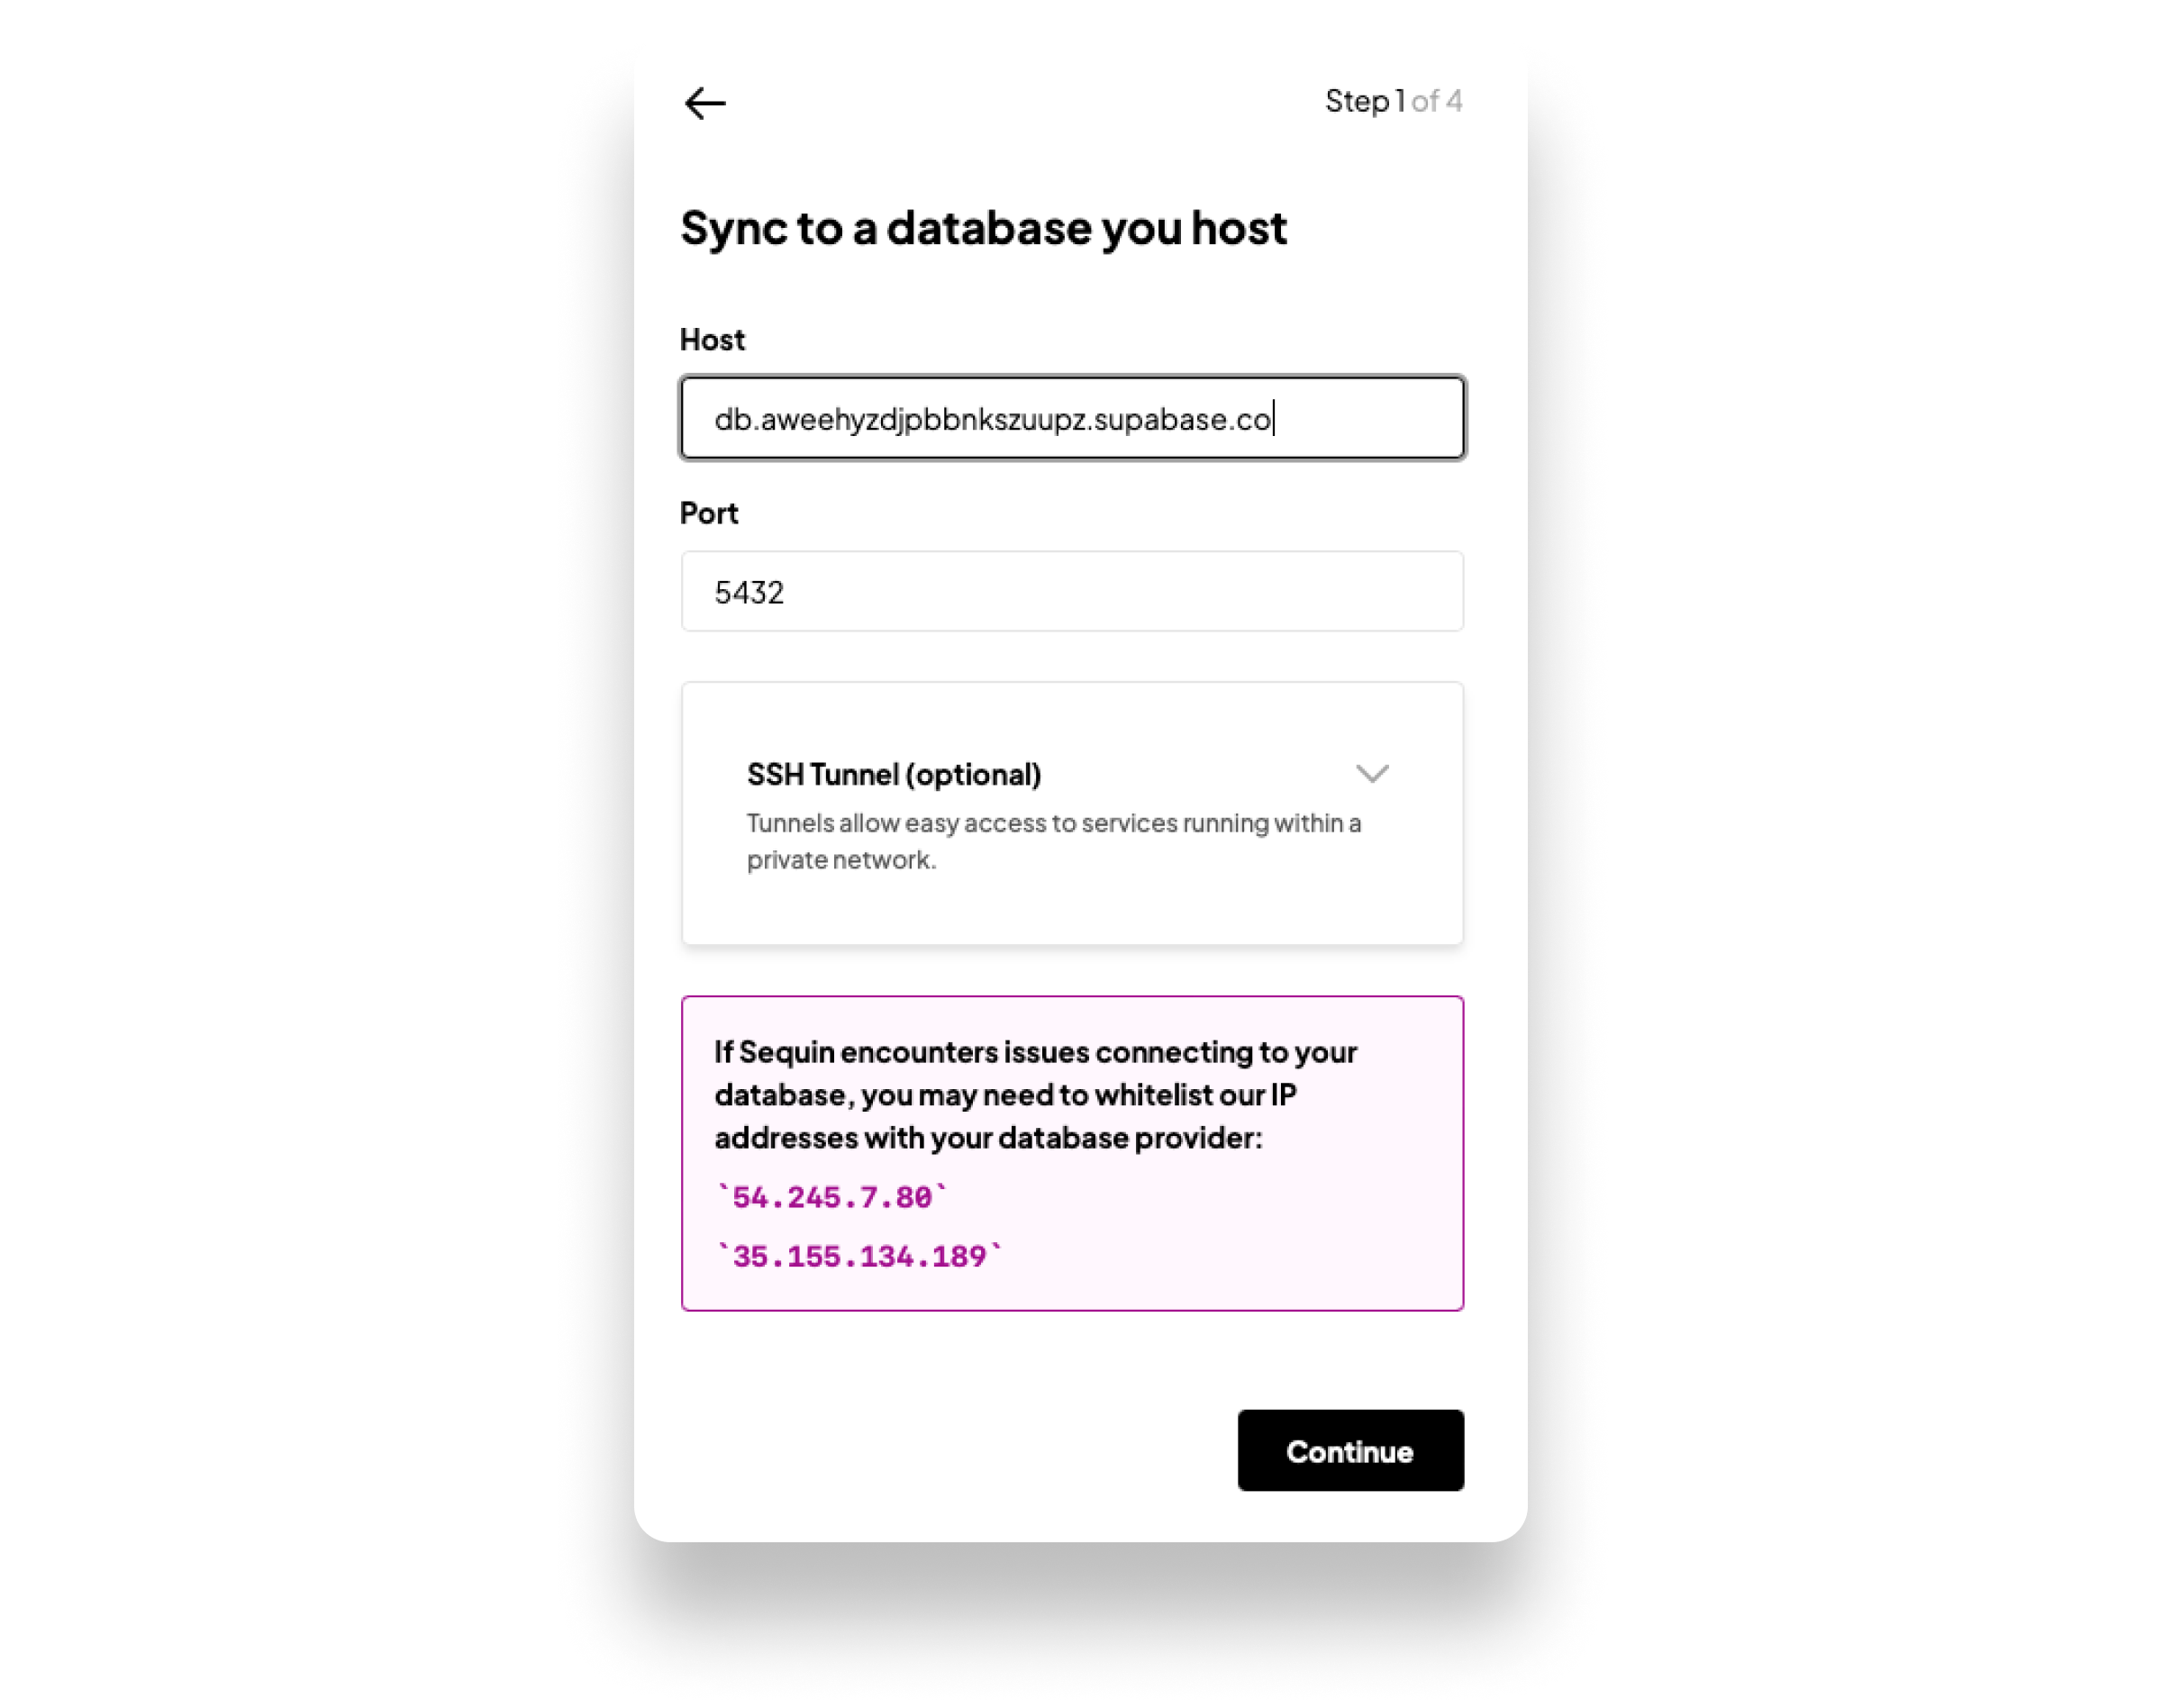
Now, enter the
Database nameand set theschemaname for your sync. For instance, if your syncing Stripe, you'll likely want to name your synced schema something likestripe. Finally, enter theuserandpasswordfor your Supabase database and then click Continue. Sequin will verify it can properly connect to your database with the correct permissions.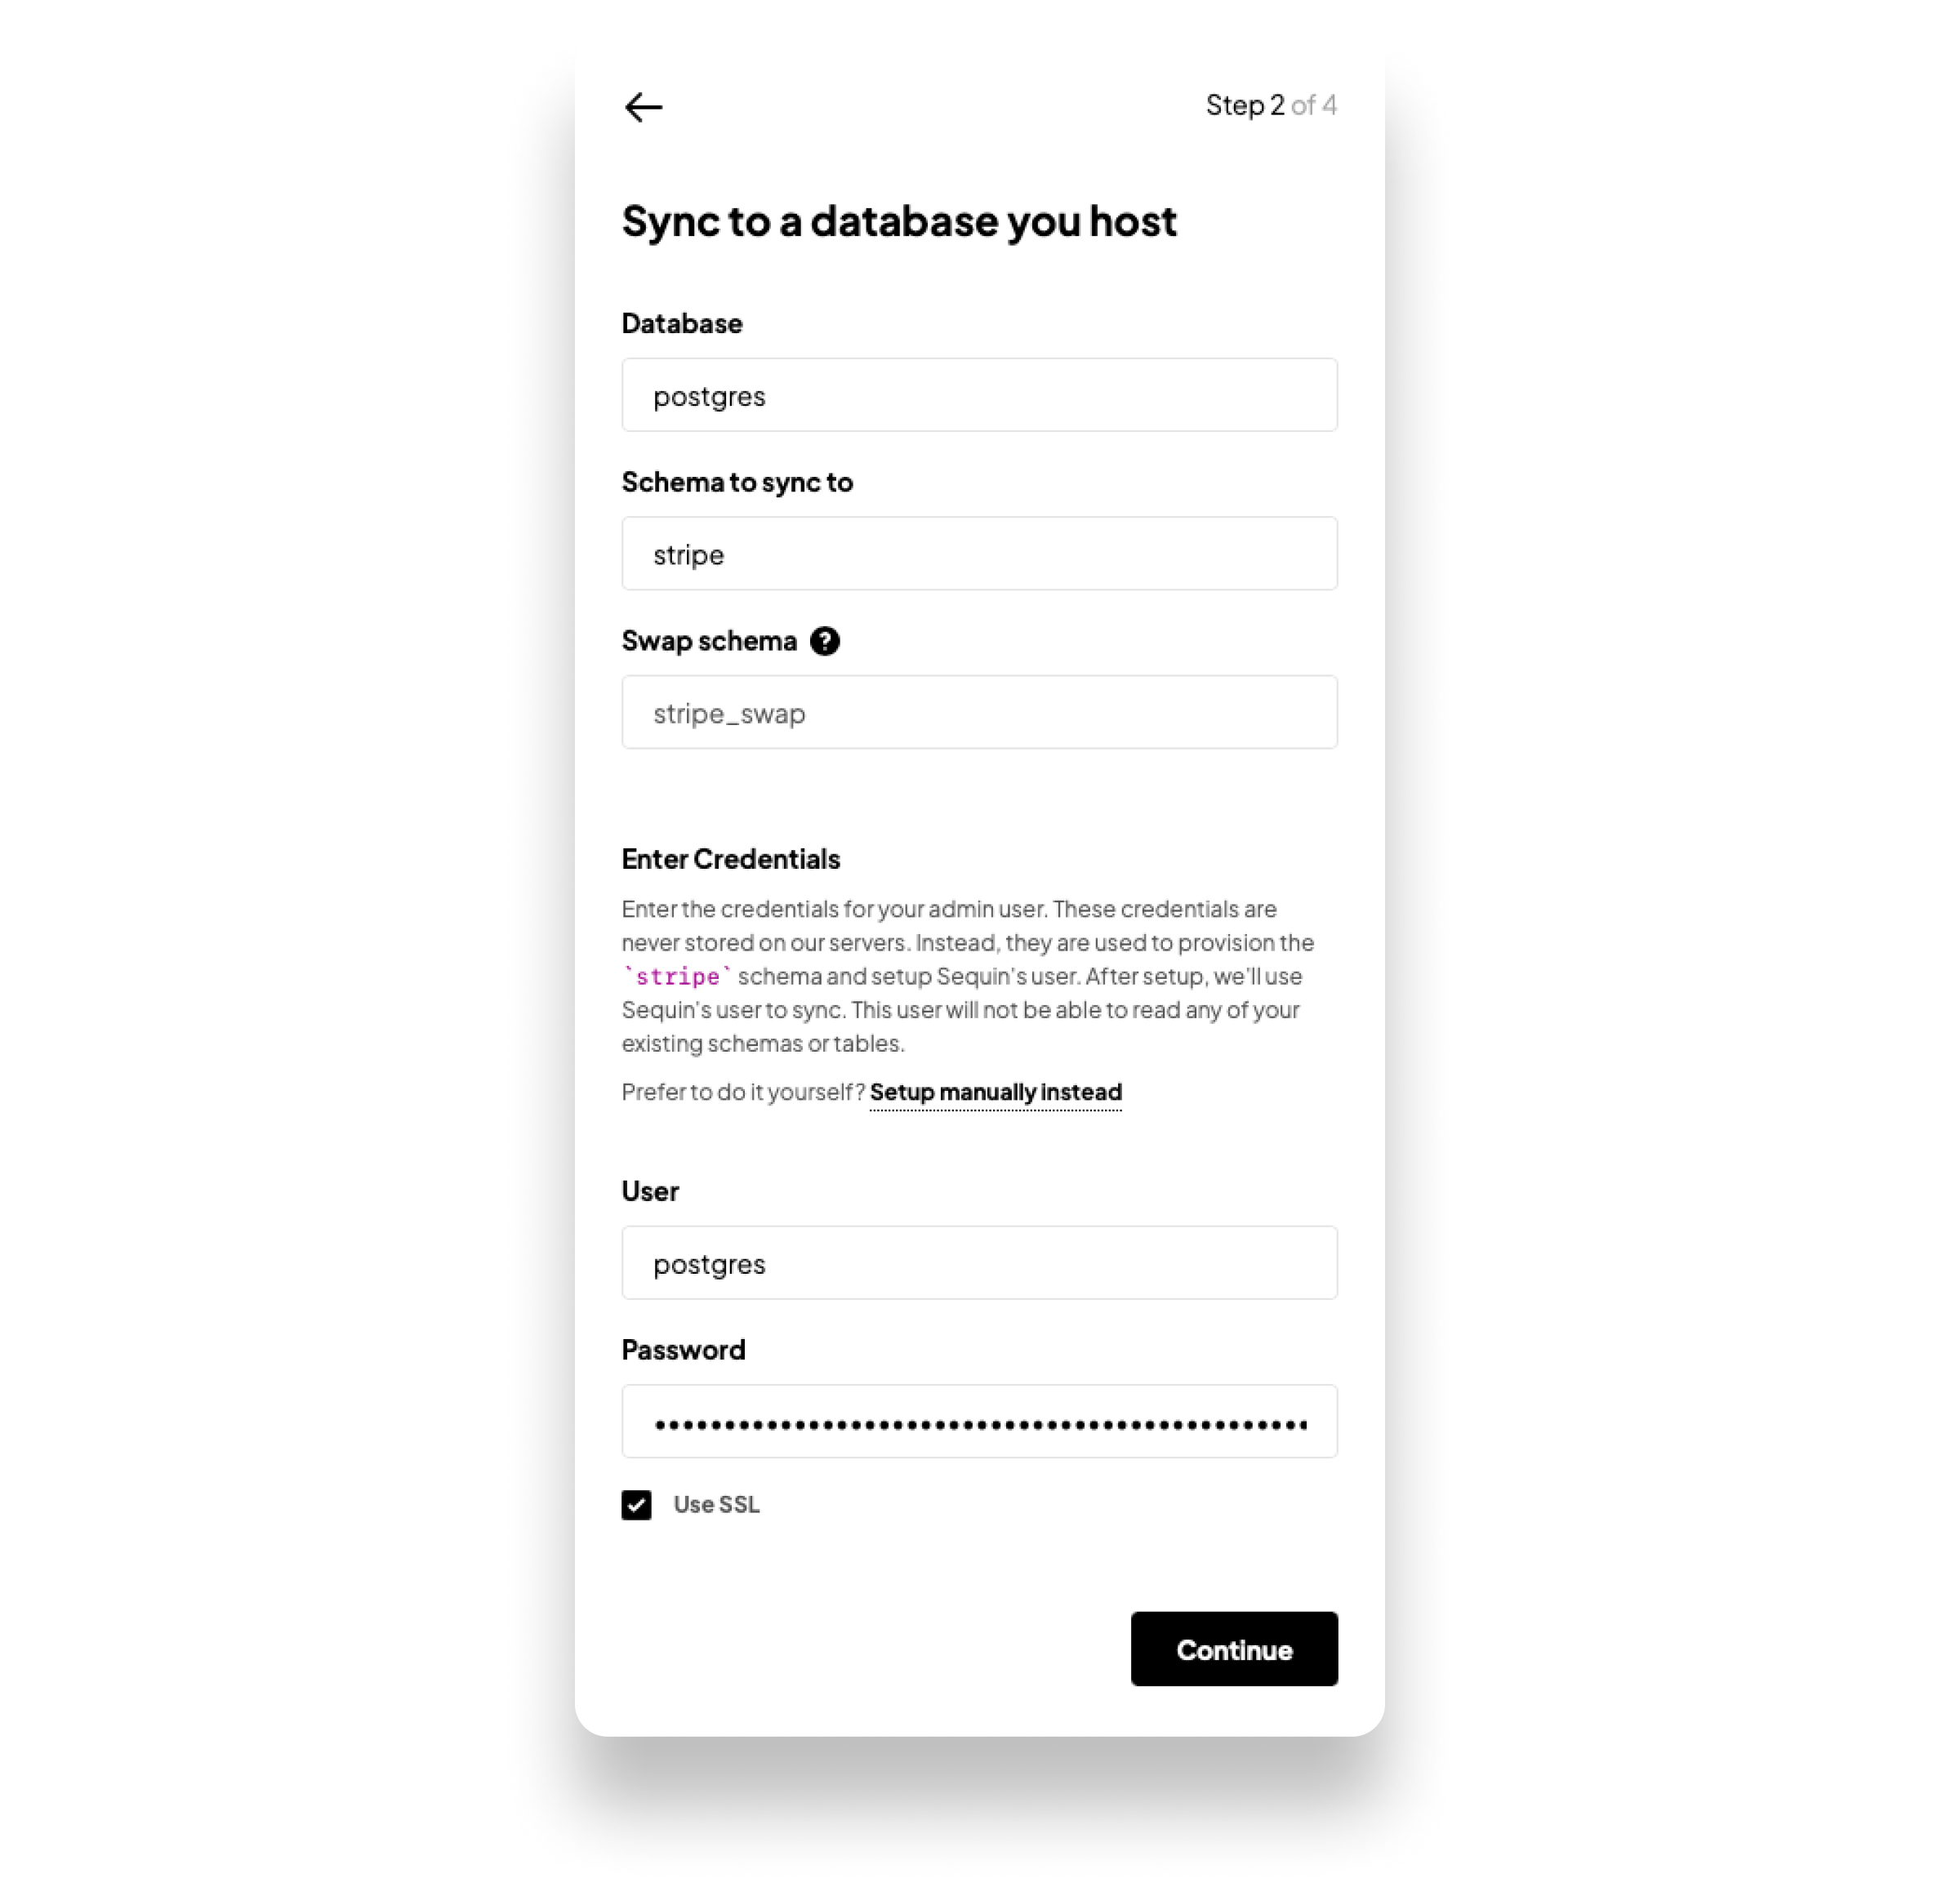
Sequin is now connected to your Supabase Postgres database and will ask you to confirm which database users should be able to access your synced schema. Select all of the users and click Continue:
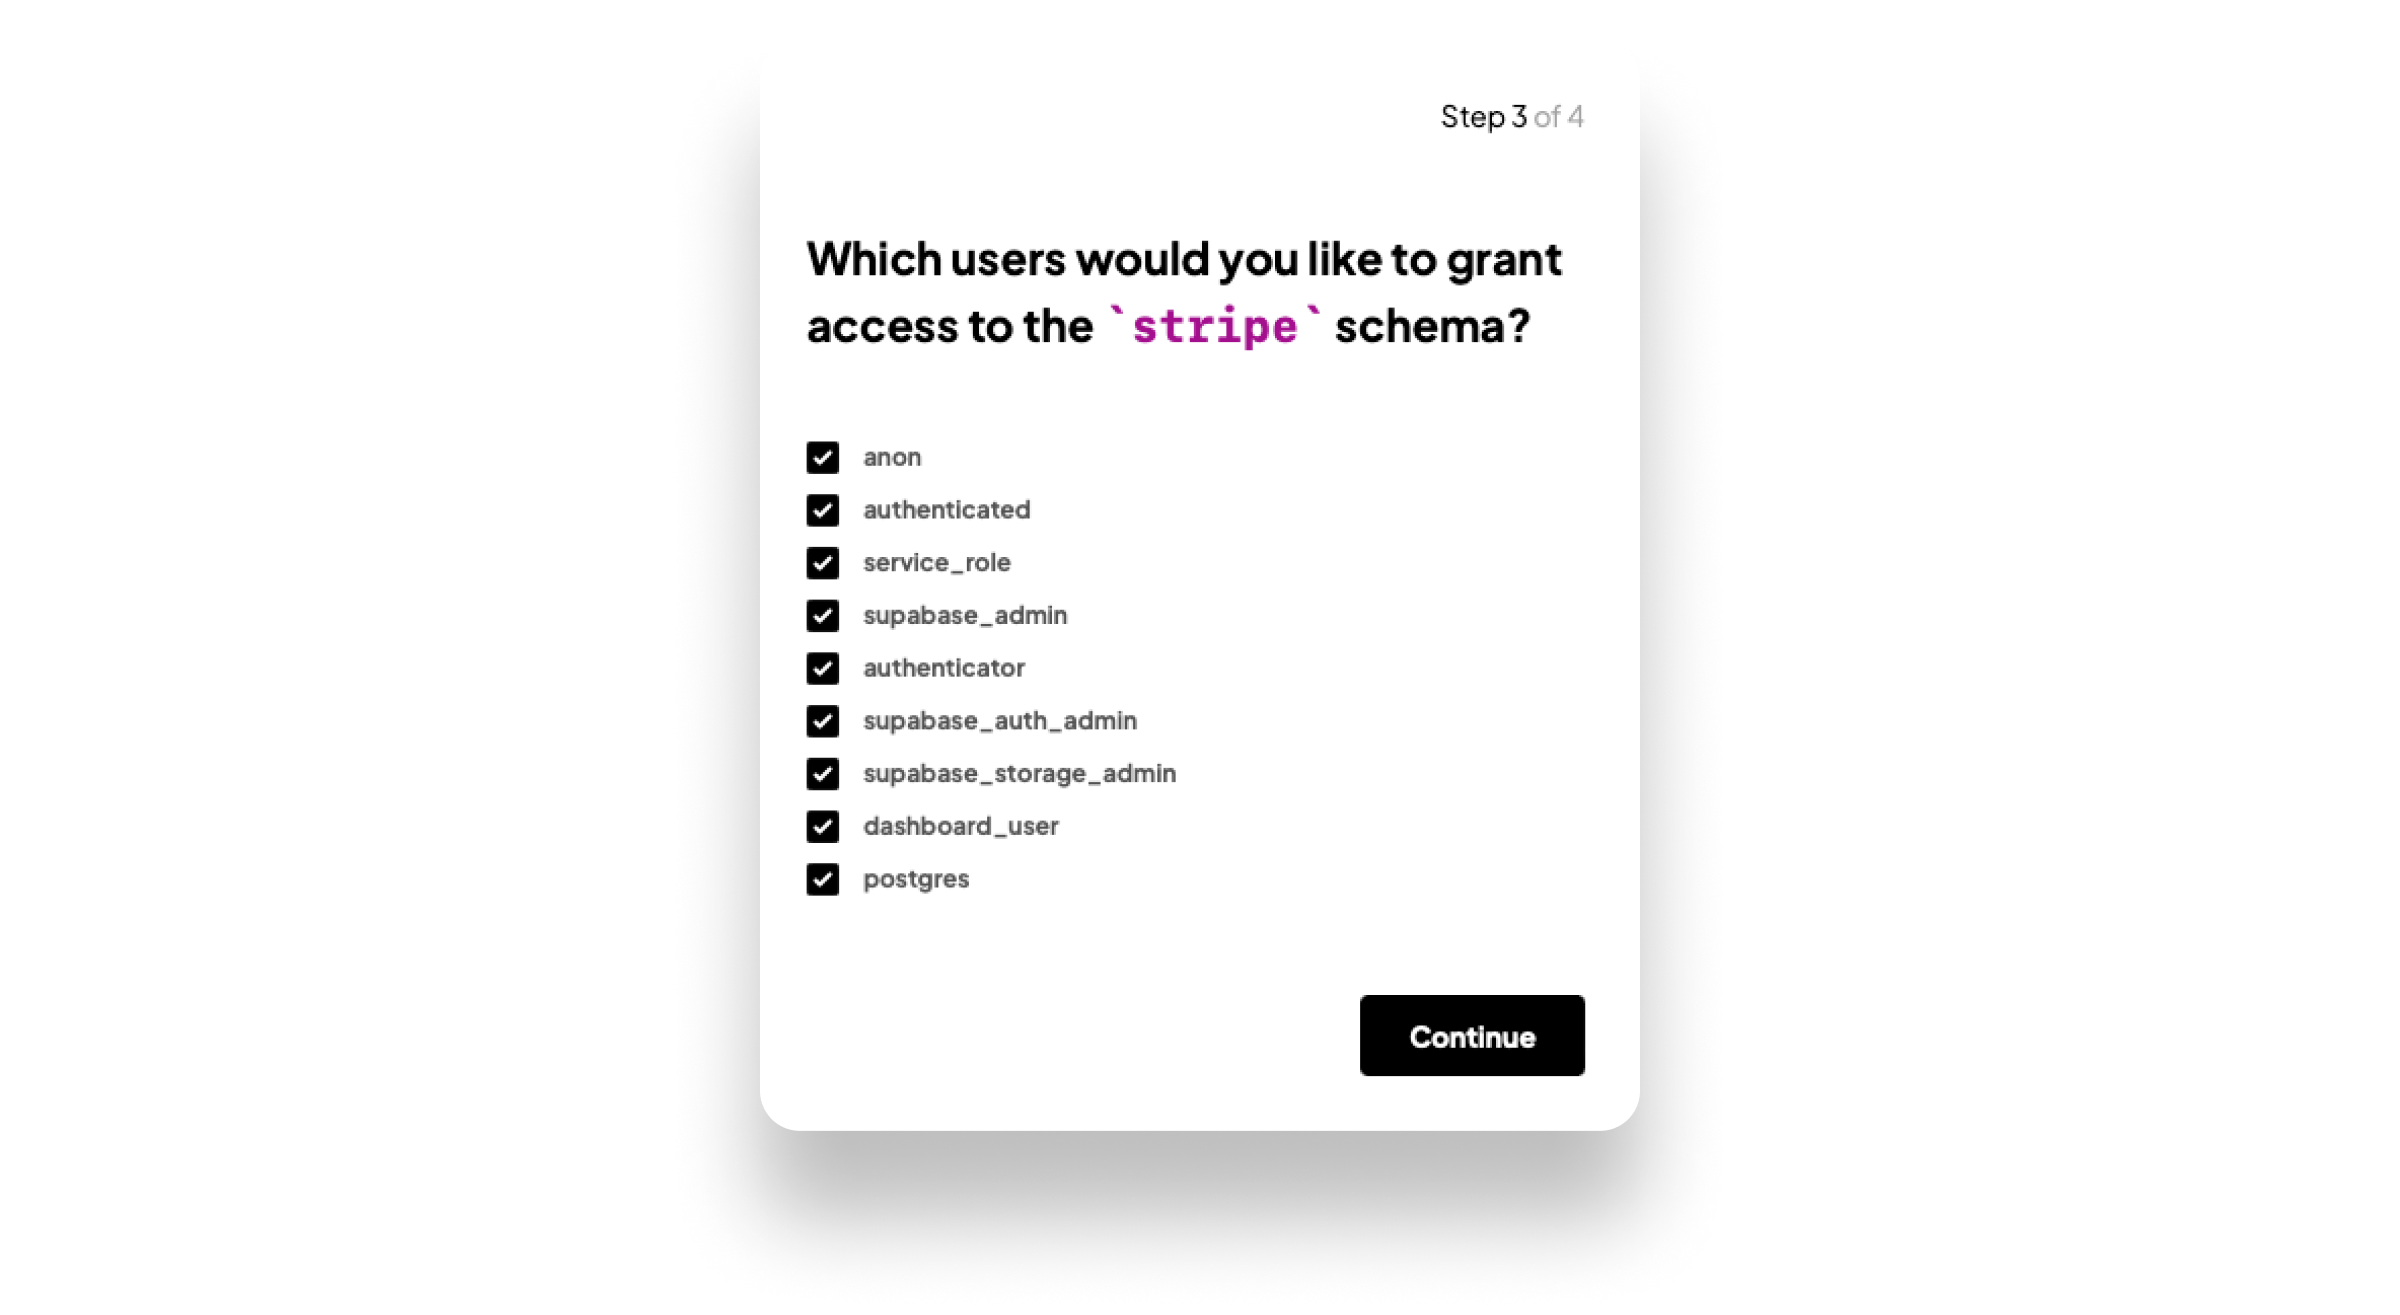
That's it. Sequin will now create a new schema and permissions group in your Supabase database. Name the database connection in Sequin something like
Supabaseand your done!
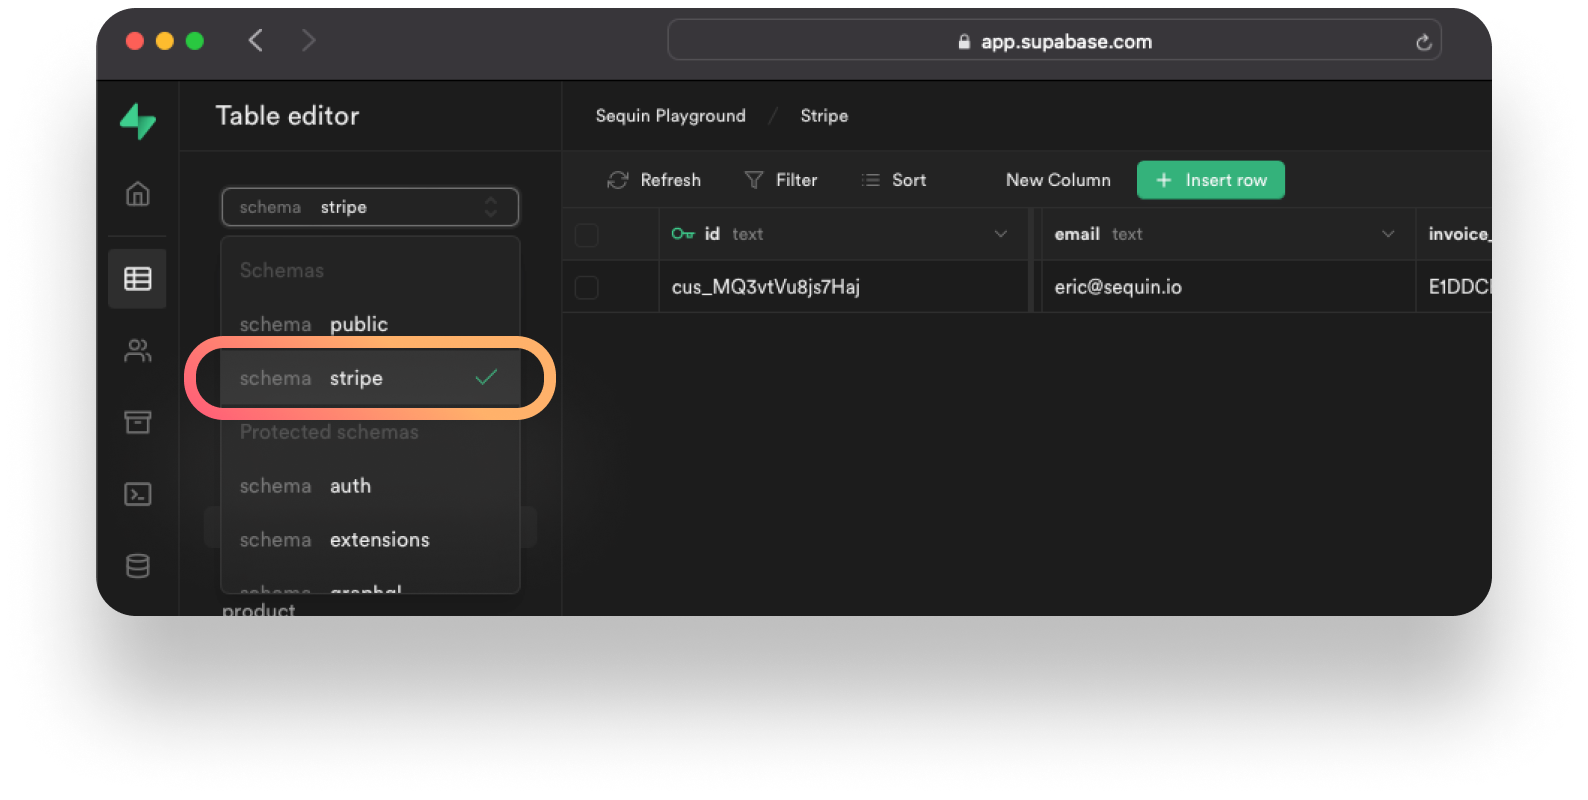
In the Supabase dashboard, you can go to the Table Editor and you'll see a new schema full of your synced platform data.
Step 2: Grant Permissions#
To ensure the right users can access the synced schema Sequin manages, you'll need to run a couple permission grants.
In the Sequin console, click the Connect button next to your sync and copy down your
Schemaand uniqueRead Group.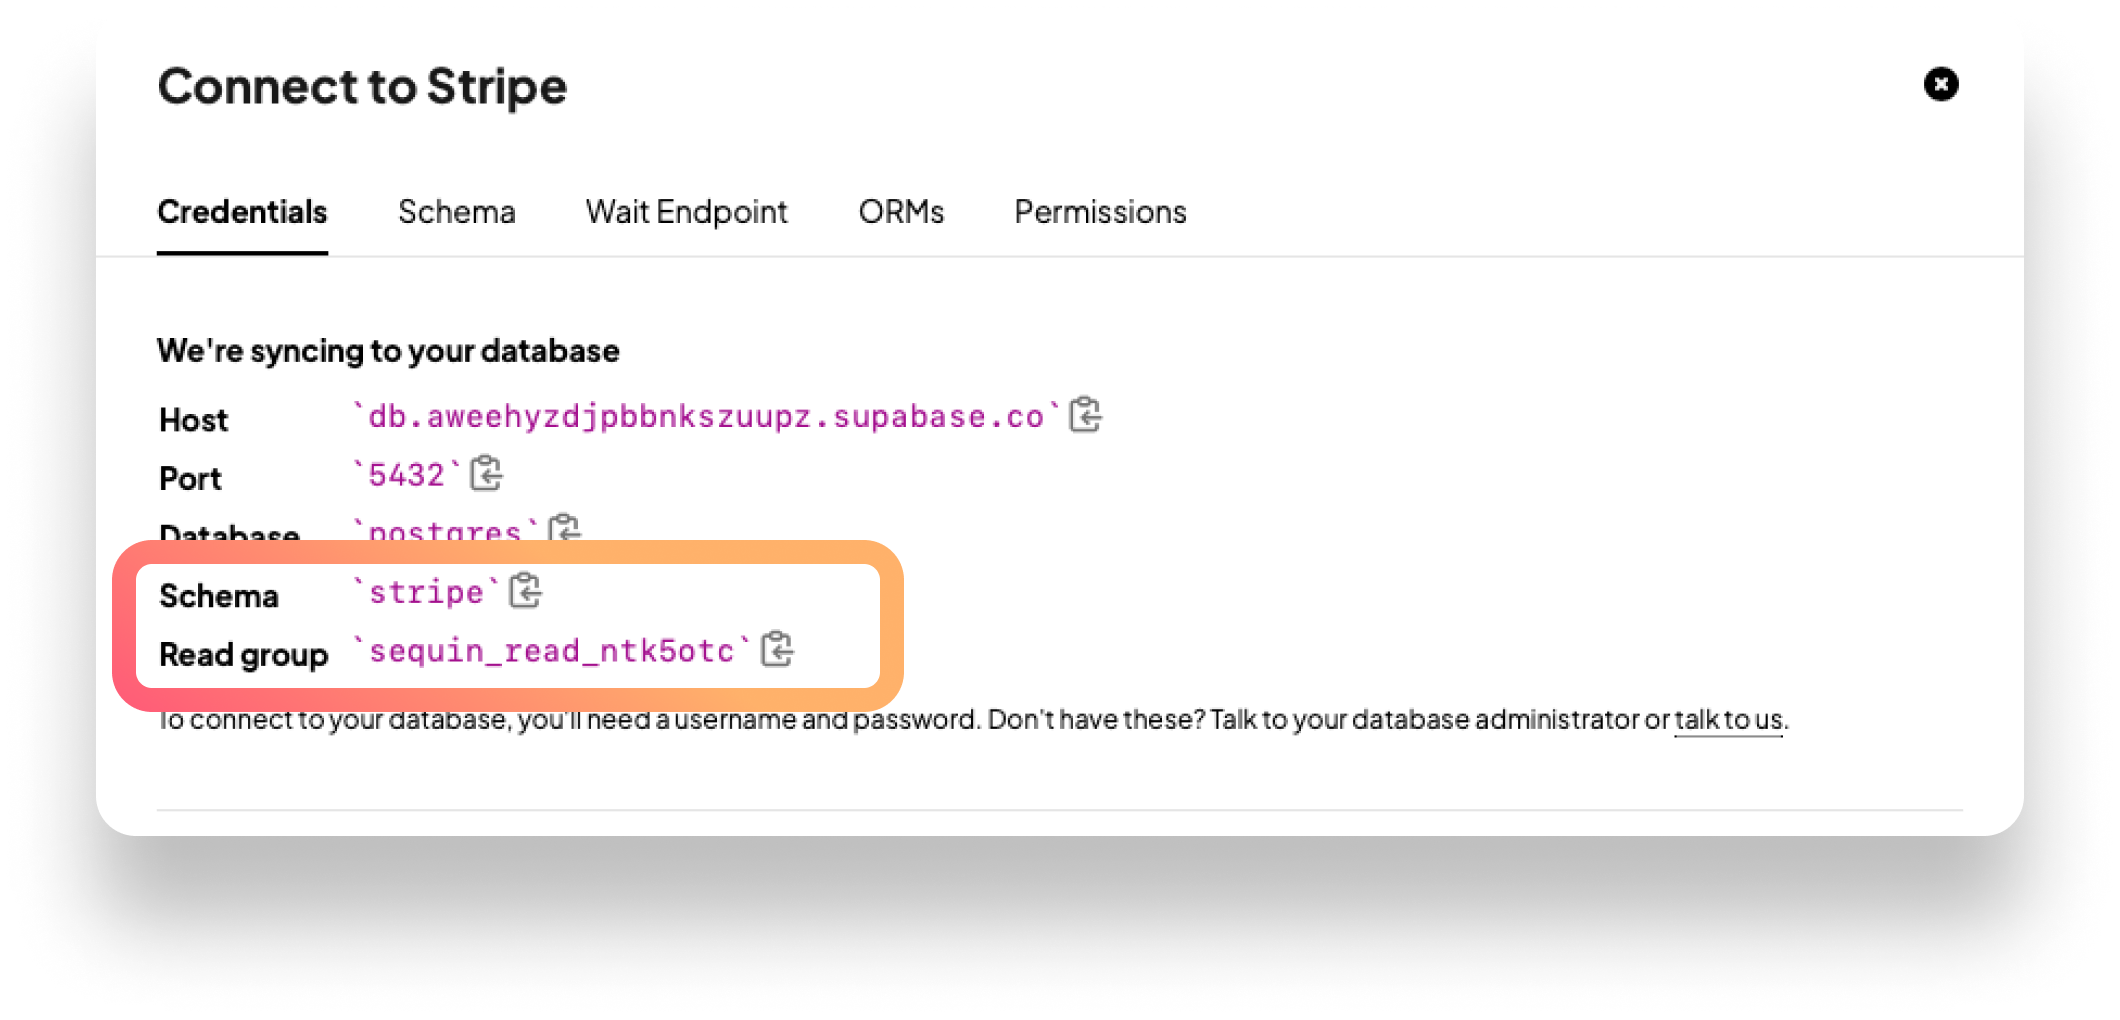
Now, in the Supabase dashboard, go to the SQL Editor and run the following permission grants:
1GRANT sequin_read_▒▒▒▒ TO postgres, anon, authenticated, service_role;
2
3GRANT USAGE ON SCHEMA {{your_schema_name}} TO anon, authenticated, service_role;
4
5GRANT ALL ON ALL TABLES IN SCHEMA {{your_schema_name}} TO anon, authenticated, service_role;
6
7ALTER DEFAULT PRIVILEGES FOR ROLE postgres, supabase_admin IN SCHEMA {{your_schema_name}} GRANT ALL ON TABLES TO anon, authenticated, service_role;
These permission grants ensure that the various Supabase database users can access and read all the tables in your synced schema.
Step 3: Configure the Supabase Client#
Finally, you'll need to define a new Supabase client in your application to access your synced schema. In the file where you initialized your Supabase client, define a new client with a schema parameter:
1export const supabase_schema = createClient(
2  'https://xyzcompany.supabase.co',
3  'public-anon-key',
4  {
5    schema: {{your_schema_name}},
6  }
7);
You'll use this client to query for data in your synced schema.
Resources#
- Sequin official website.
- Sequin Console.
- Sequin documentation.
- Sequin + Supabase + Stripe Tutorial